Introduction
What is the first vector a threat actor is going to use to get into your environment? Email. Better protect your users and cloud collaboration platforms from the latest threats with next generation security. Microsoft Defender for Office 365 is a comprehensive solution safeguarding your users and platforms from ransomware, malware, and other malicious activities. This blog post will dive into the key features and best practices for using Defender for Office 365.
What is Defender for Office 365?
Microsoft Defender for Office 365 is the layer of protection for Exchange, SharePoint, Teams, and OneDrive within the Defender XDR suite. Defender for Office 365 works to detect, analyze, and remediate issues across the Office 365 workloads before they become a larger issue for your organization. With some of the advanced features of Defender for Office 365 it can automatically respond to threat events, correlate data between other platforms within the Defender XDR, and even provide your users educational email exercises.
Key Features
Preset Security Policies
For those that are less technical reading this blog, this is right at the top. In the event you don’t know what you want to configure, you can use the preset security policies. Microsoft offers both Standard and Strict policies. I recommend keeping your users in one of these policies, otherwise they do have different behavior, and it can be hard to predict what they are experiencing depending on the policy assigned. This post won’t go to deep into the presets, but you can read more about them here: https://learn.microsoft.com/en-us/defender-office-365/step-by-step-guides/ensuring-you-always-have-the-optimal-security-controls-with-preset-security-policies
Safe Attachments
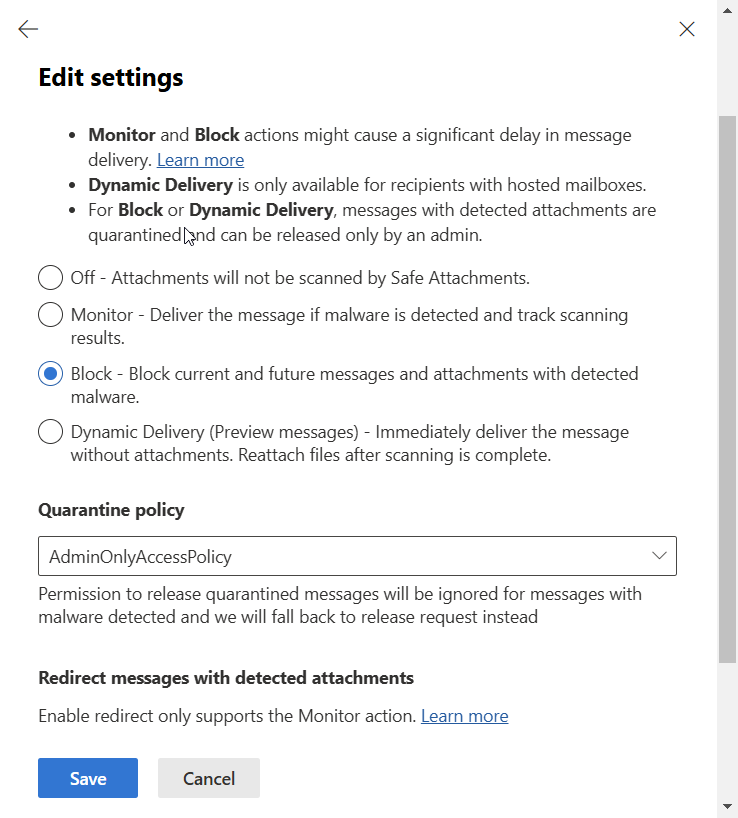
To check the validity of the files coming into your environment, Defender for Office 365 launches and scans each file in a secure and isolated environment. This can be setup to perform scanning before the message is delivered to your users or can deliver the message without the attachment until after it completes scanning. My recommended approach is to hold the messages until the scanning completes, then deliver the message. If you configure it the other way, your users may get a message with malicious instructions in the body of the message. This wouldn’t be ideal, but you also would have your users recognizing the small delay caused by the additional scanning. Even though it is typically less than 2 minutes, users wont notice that if the message isn’t delivered to them right away and is held for delivery out of their sight. My recommended policies configurations are below:
Make sure all of your domains are targeted by the policy. Threat actors will commonly target your .onmicrosoft.com and your mail.onmicrosoft.com domains thinking you may have not applied security policies to them.

When you configure your policy, you have the selections I mentioned above. Block is the recommendation for user experience and administrative overhead. I also recommend sending these messages to the admin only quarantine, so in the event a message needs to be reviewed an admin can do it, and you also stop your users from releasing malware.
Finally, here are the global settings. These can be enabled with very little impact.

Safe Links
SafeLinks scans the URLs in real-time to protect your environment from your “happy-clickers.” Traditional URL scanning will just scan the URL one time, upon delivery, and ensure it is safe at the time of delivery only. Defender for Office 365 will continually monitor the validity of the URL even after delivery. My recommended SafeLinks policy is linked below:
Again, make sure all of your domains are protected by the policy:
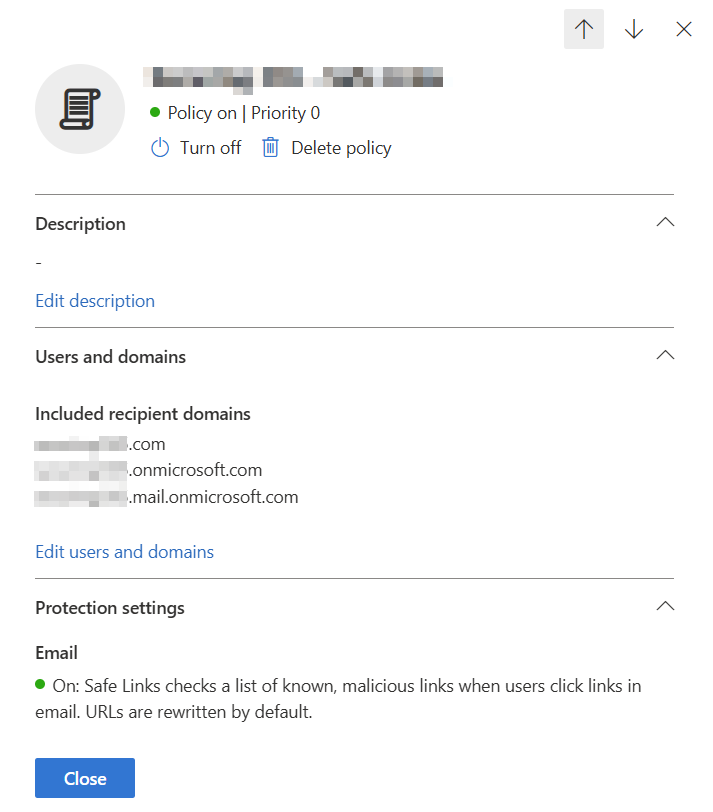
Within the protection settings, we want to make sure that we are enabling all applicable features. We want to make sure links are checked on internal messages because in the event of an account takeover, malicious links may be circulated internally first.
If you have applications that are sensitive to URL rewrites, you may want to consider having the platform do checks via the API.

Next, lets make sure the service is enabled for Teams and the O365 apps. We also want to make sure the user links are tracked so we can perform an investigation on if users are clicking malicious links. We also should not allow users to click through to the original URL.

Phishing Protection and Anti-Spoofing
Defender for Office 365 uses machine learning and AI analysis to protect and block phishing attempts. Anti phishing will best protection against the common attacks where threat actors will create an email address similar to your CEO’s and ask your users for gift cards. These attacks will also protect against even simpler attacks where a threat actor will forge headers to make it look like it came from your own domain. My recommended policy configurations are below:
Just like the other policies, make sure all of your domains are included and targeted here:
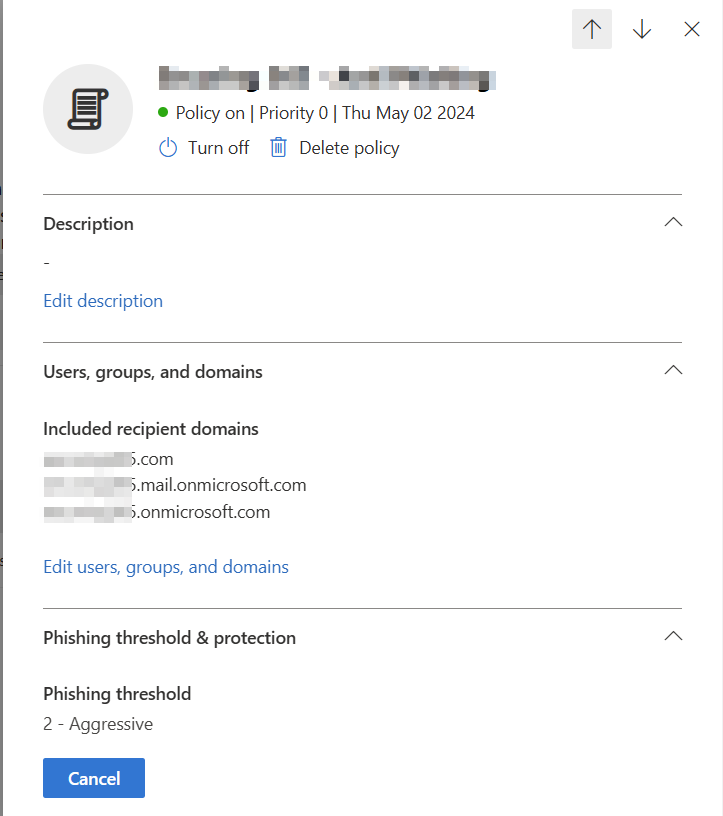
Once you enter the protection settings your portal will (slowly) load the insights into the user and domain impersonations over the last 7 days. You can open this report to see if any are legitimate. My domains don’t get a ton of traffic using impersonation, so there is nothing in my reports. For user impersonation protection, you may be wondering: “Who do I add to impersonation protection?” Well, according to Microsoft you will want to add folks that are in key roles and may have their email details published publicly. Examples would be top-level executives and board members.

You can add trusted senders and domains that use impersonation. A common application that uses impersonation and would most certainly cause issues with this is Salesforce. Mailbox intelligence and intelligence for impersonation protection work very well and are recommended to be enabled. One thing that impersonation protection will catch is personal email addresses. If your CEO (or any user for that matter) sends email into your environment using an AOL or Gmail account with a matching display name as their internal, it WILL be caught. The reason it is caught is because the platform cannot validate who owns that account or who is actually controlling it. There isn’t much stopping a threat actor from creating a similar Gmail account and launching an attack, and that is what we are protecting against. If this causes issues, you’ll want to explain this scenario and why it should not be allowed through.

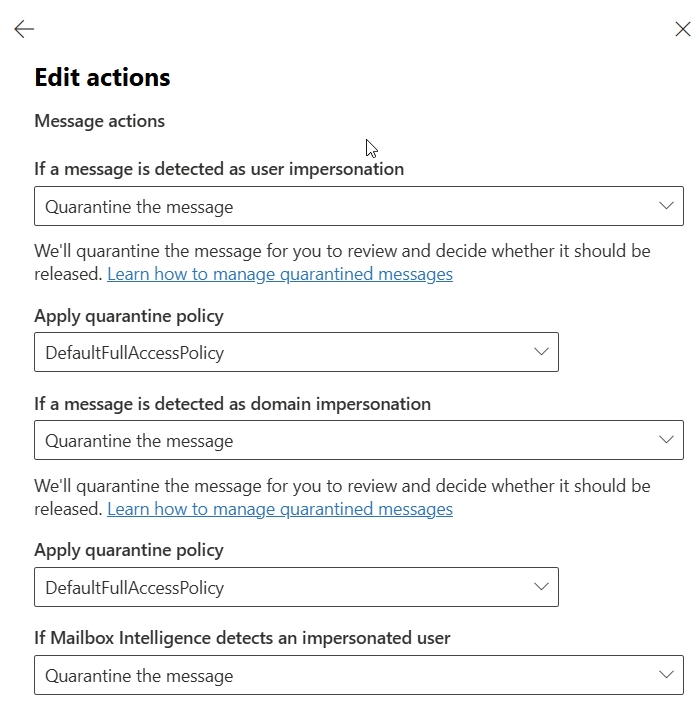
Generally, the actions for impersonation events should be to quarantine the message. In some instances I could be convinced to send them to an admin only quarantine, but the big reason I would let users release messages is because some legitimate mail does still get caught here. An application that doesn’t always impersonate or a user needing to email themselves an image of a receipt for expense reimbursement are just a couple of examples.
Spoof intelligence is the only one in this list that I currently have configured to be sent to the admin quarantine. This is a pretty high confidence event that something nefarious is happening. Worst case scenario, an admin has to release it. Again, all of these are subjective and could be more strict or less strict depending on your organization’s appetite for risk.

At the bottom of the actions page is this section for safety tips and indicators. These tips are useful because they will give warnings to your users when messages may be out of the ordinary. For example, the first contact safety tip should raise some eyebrows for your users if they are getting an email from IT for the first time, when in fact it may be a threat actor pretending to be IT. An example of what the messages look like are all below. I recommend using each of these and educating your users on the importance in every email.

First Contact Safety Tip:

Automated Investigation and Response (AIR) (Defender for Office 365 P2)
When alerts are generated in Defender for Office 365, whether it is a malicious link being clicked or an email message was reported as suspicious, automated activities are possible. Automated Investigation and Response will automatically leverage prebuilt Microsoft playbooks to investigate email events and correlate activity for security analysts. Below is a screenshot showing the automatic investigation of a weaponized URL that successfully compromised a user and took action to block the URL for future emails, delete the email from other user’s inboxes, reset the user’s password, and enforce MFA on the next sign in. 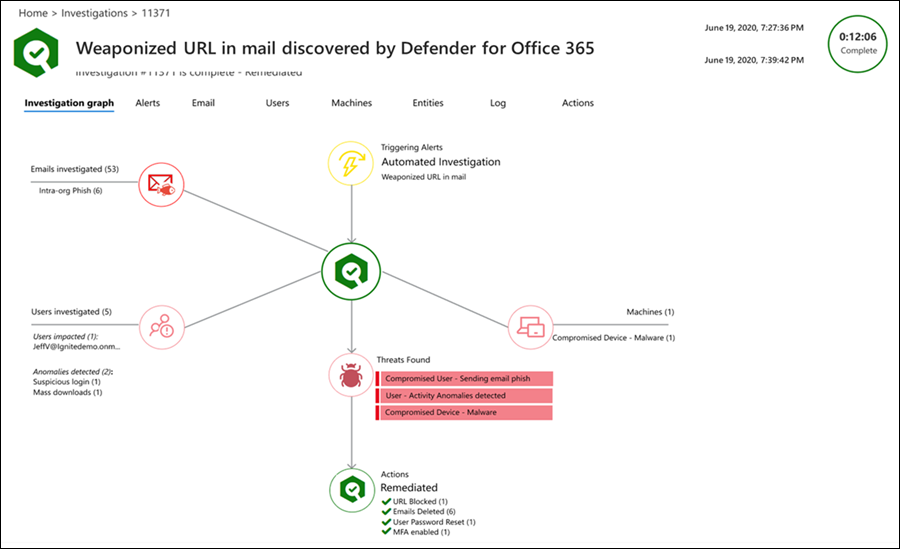
Attack Simulation Training (Defender for Office 365 P2)
This feature can easily replace other 3rd party tools out there for email simulation training for end users. This can be automated and setup so even your administrators don’t know when the emails will be coming through. Attack simulation training is a good way to keep your users on guard and train them on safe practices for URLs and attachments.
Conclusion
With cyber threats on the rise, securing your email and collaboration environment is a must. With Defender for Office 365 being included in many Microsoft License SKUs, its possible to enable it and potentially even save money. These policies are not enabled by default, but once created your organization will be in a much better place. If you are having issues with spam even after these settings are configured, there is a chance even more hardening is necessary. Reach out to me by clicking the button at the top and scheduling a consultation.