
As organizations continue to embrace cloud-first strategies, securing traffic between users and Microsoft 365 services becomes mission-critical. While Microsoft invests heavily in securing its infrastructure, organizations must still protect their traffic pathways to prevent data interception, session hijacking, or unauthorized access. Enter Global Secure Access (GSA)—a powerful feature set included with Microsoft Entra that enables secure, identity-aware access to Microsoft 365 traffic.
In this post, we’ll explore how to leverage the included version of GSA to protect Microsoft 365 traffic using the Microsoft 365 network traffic profile, all without additional third-party agents or VPN solutions.
What is Global Secure Access (GSA)?
Microsoft’s Global Secure Access is a Secure Access Service Edge (SASE) solution. This provides secure and policy driven access via a VPN tunnel through Microsoft’s network. Global Secure Access has two components:
- Microsoft Entra Internet Access (for Microsoft 365 traffic)
- Microsoft Entra Private Access (for hybrid or on-premises apps)
Within your Entra ID Plan 1 or Plan 2 licenses, we can utilize Microsoft Entra Internet Access for the Microsoft 365 traffic and protect your users and their access to the Microsoft platform. Microsoft Entra Private Access wont be covered in this post, but is covered in another.
Why do we need to protect network access?
Even though your traffic between your device an Microsoft 365 are served over HTTP, there are other things at play that need to be considered when thinking of your users:
- Unmanaged Device Access to M365
- Bypassing of Conditional Access Policies
- Man in the Middle Attacks
When we adopt Global Secure access we can have these outcomes:
- Faster and more reliable connectivity to Microsoft 365
- Enforcing of Identity Controls at the Network Layer
- Simplification of Conditional Access Policies
Let’s Configure Global Secure Access for Microsoft Traffic
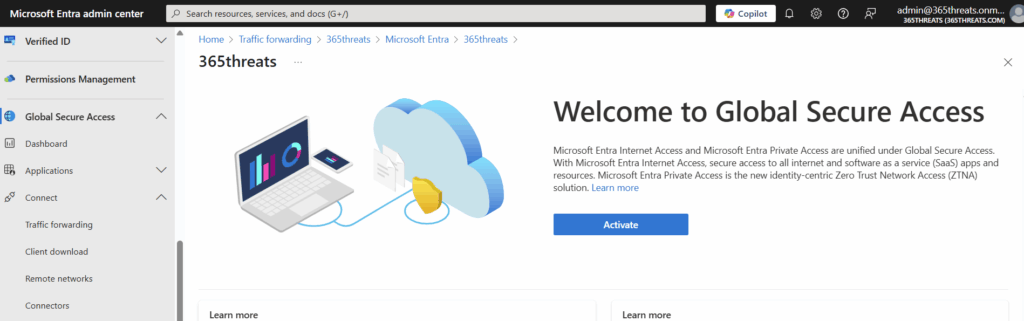
We need to start by going to the Entra admin center then enable Global Secure Access there. The URL is https://entra.microsoft.com/#view/Microsoft_Azure_Network_Access/Welcome.ReactView
Once we navigate to the URL we have to enable the service by clicking “Activate.”
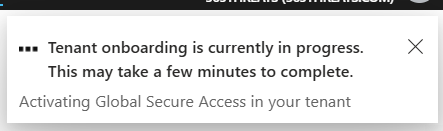
Tenant onboarding can take a few minutes, so go grab some coffee.
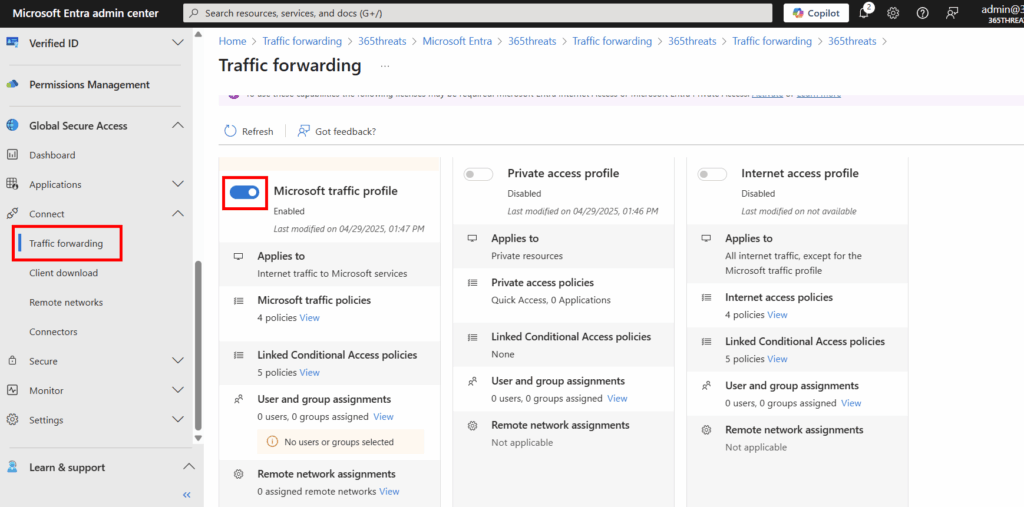
Now that we are onboarded, let’s go to the traffic forwarding blade and enable the Microsoft traffic profile.
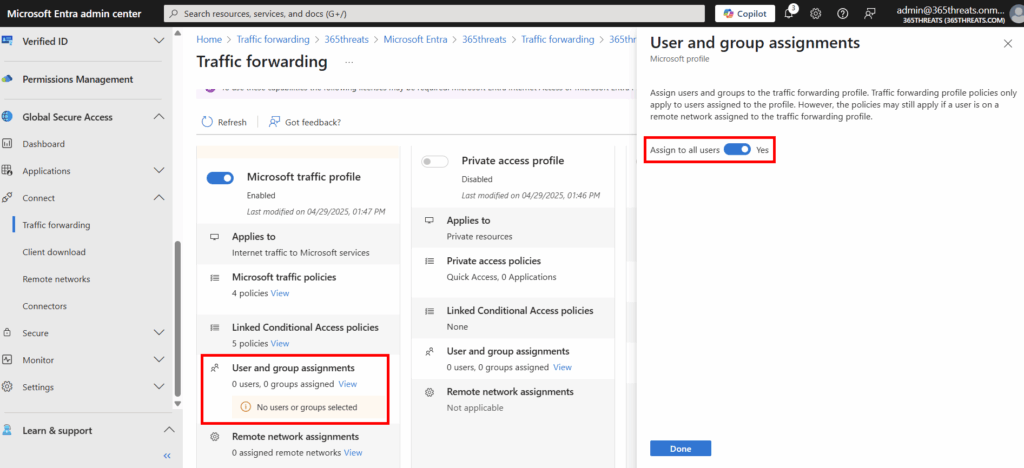
We don’t have any users assigned to this profile. In my instance, I’m going to target all users since I don’t have the Global Secure Access Agent deployed yet. If you do have it deployed, you will want to make sure that you are targeting a pilot security group to ensure you don’t cause any untested adjustments to your production users.
Let’s Deploy the Global Secure Access Agent
Now that we’ve got the traffic forwarding set, we need to get enable our users to use it. Right now, without the agent deployed, we haven’t actually done anything. User traffic is still flowing to M365 unprotected.
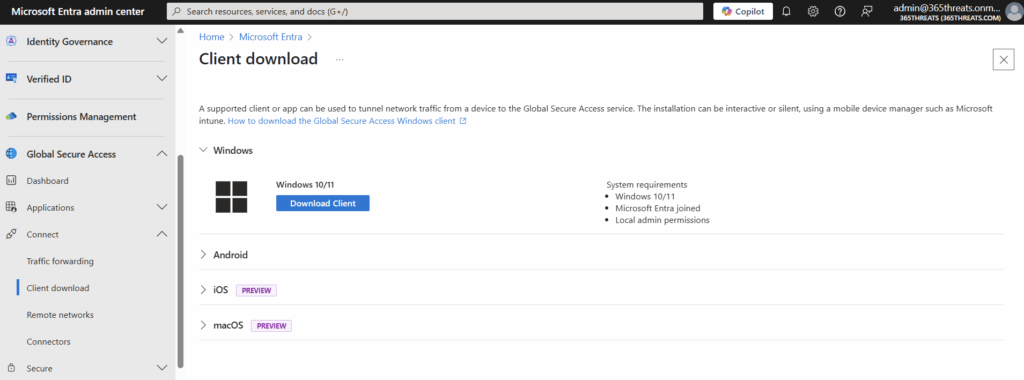
Let’s collect our installer by going into the Entra Admin Center > Global Secure Access > Connect > Client Download. Also linked here.
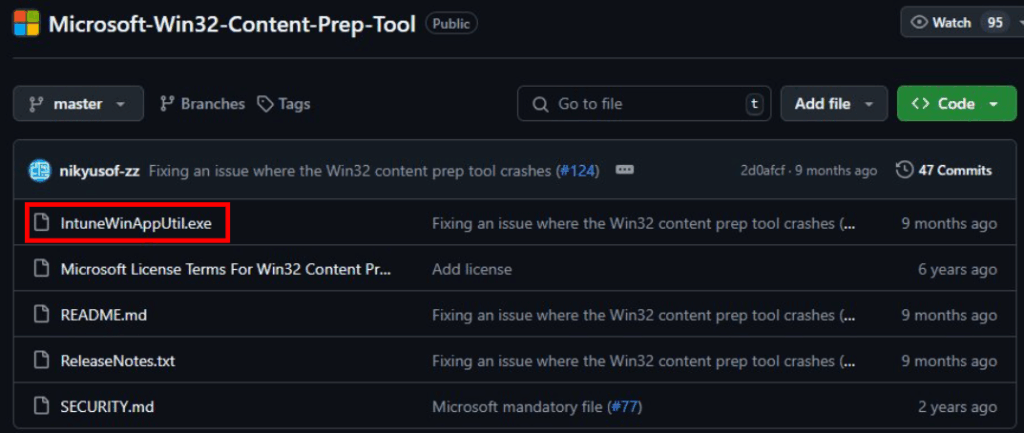
Now that we’ve got our executable, we will need to use the Win32 app util to convert it to an .intunewin file. Select IntuneWinAppUtil.exe.
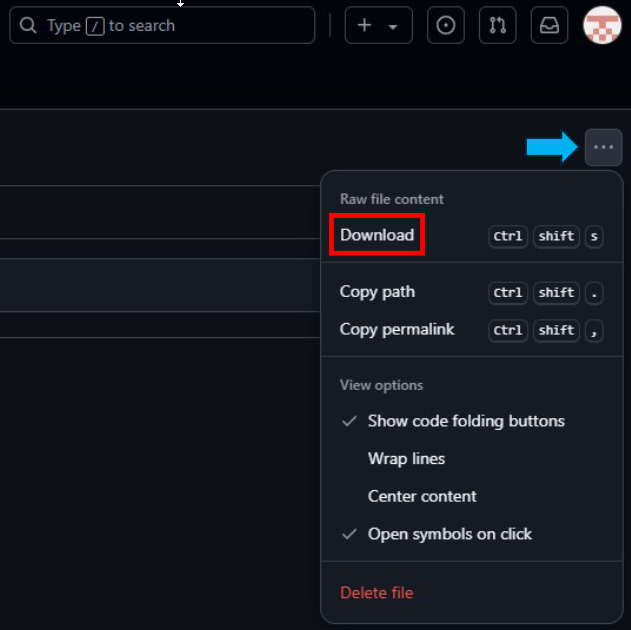
Select the three dots in the upper right hand corner and select “Download”
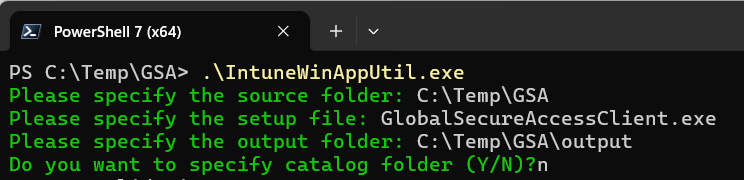
Navigate to and run IntuneWinAppUtil.exe. A command prompt should open.
Enter the folder path where the Global Secure Access .exe file is located and press Enter.
Enter the name of the Global Secure Access .exe file and press Enter.
Enter the folder path of where you want the .intunewin placed and press Enter.
Enter N and press Enter.
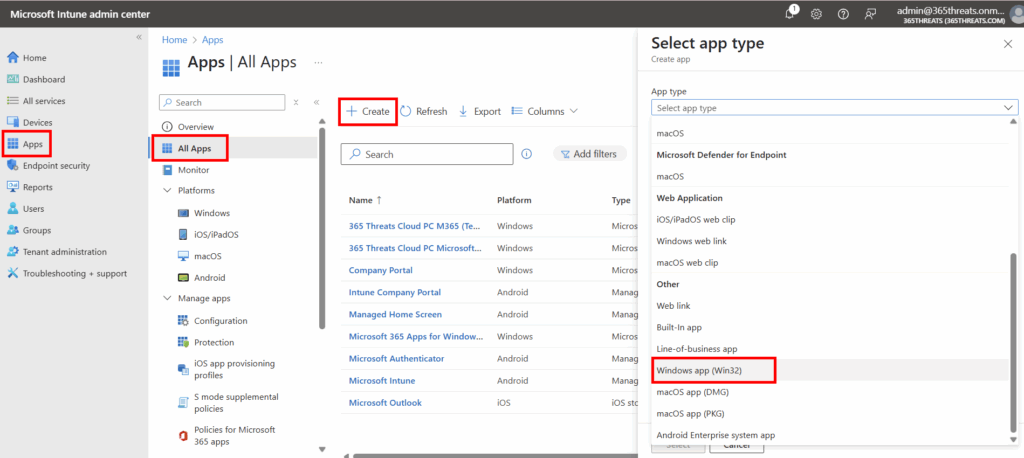
Now we can go to the Intune Admin Center.
Navigate to Apps > All apps > Create. Then Select App Type > Windows App (Win32)
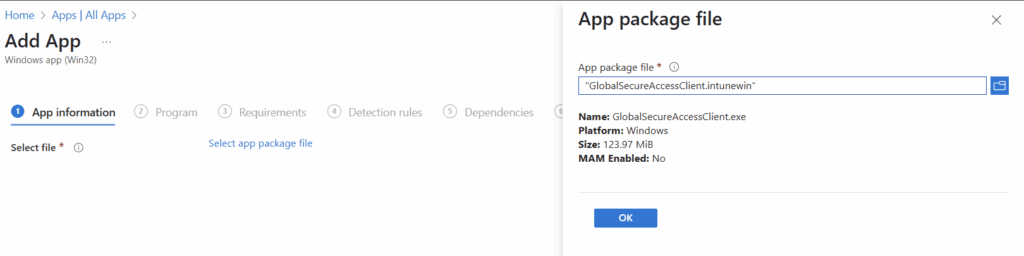
Next we will select our file we just created.
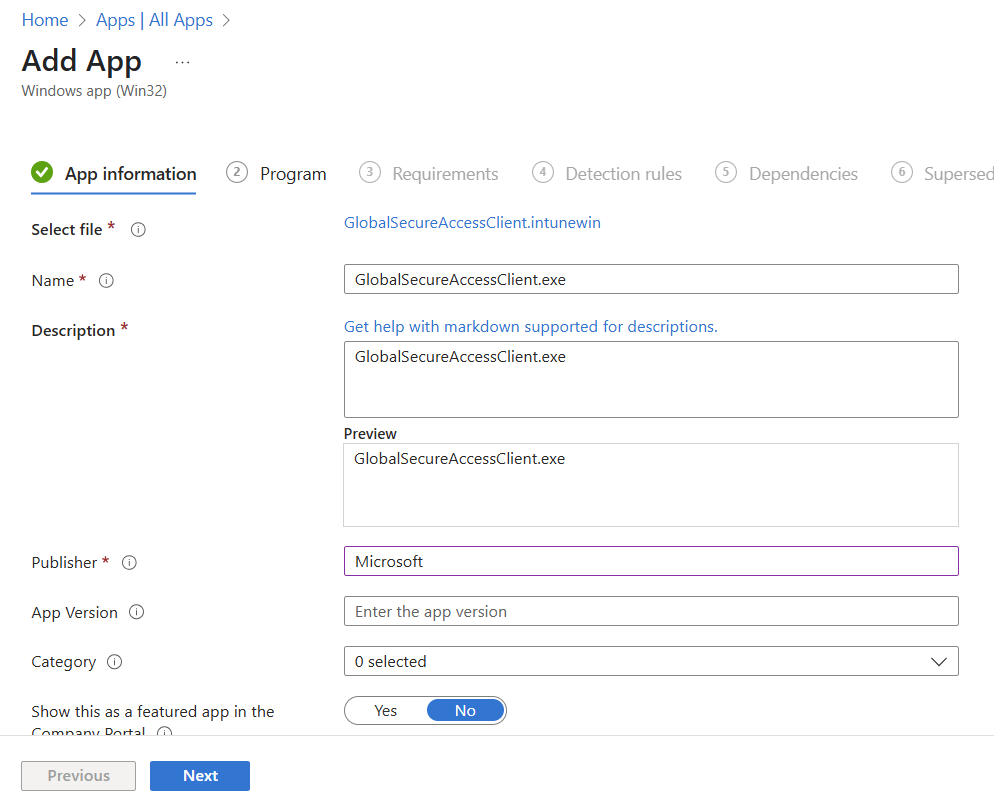
On this screen you will just need to add the publisher information (Microsoft). From there, you can optionally add versioning, category, logo, etc.
Once we click next we need to populate the fields with the below:
- Install command : Using the original name of the .exe file enter the following value: “GlobalSecureAccessClient.exe” /install /quiet /norestart
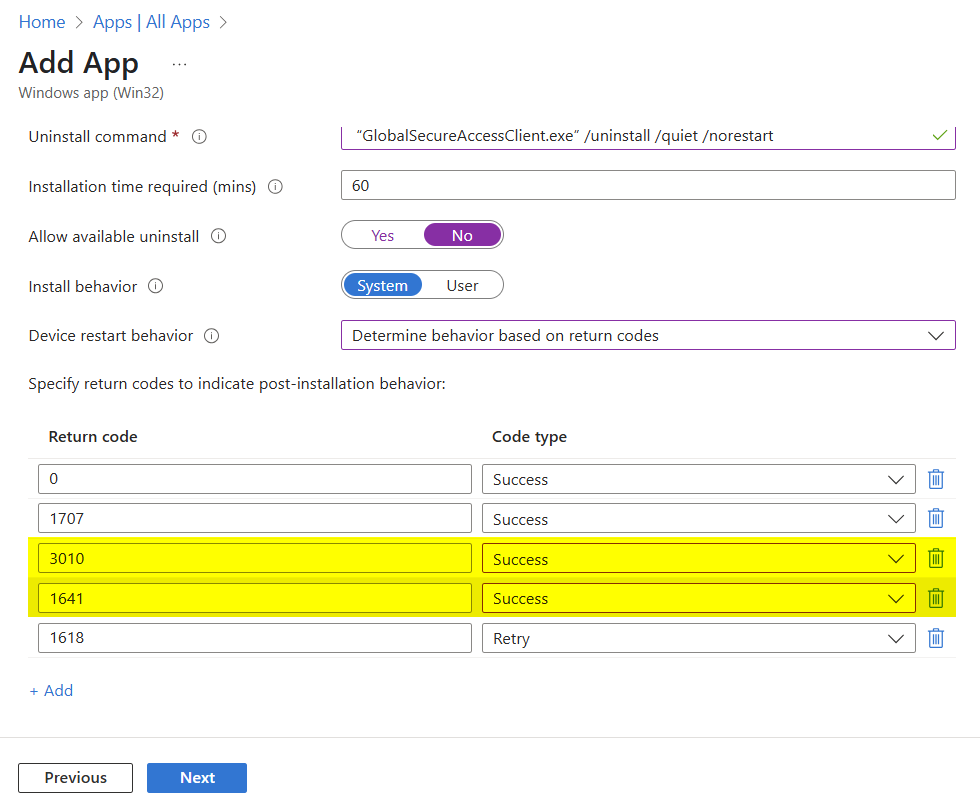
- Uninstall command : Using the original name of the .exe file enter the following value: “GlobalSecureAccessClient.exe” /uninstall /quiet /norestart
- Allow available uninstall : Set to No
- Install behavior : System
- Device restart behavior : Determine behavior based on return codes
| Return Code | Code Type |
|---|---|
| 0 | Success |
| 1707 | Success |
| 3010 | Success |
| 1641 | Success |
| 1618 | Retry |
NOTE: While these are populated by default, we need to update the two highlighted in the screenshot below to ensure we don’t have unnecessary reboots.
On the next screen is Operating System architecture and Minimum OS requirements. You can define these. Here is what I put:

Next is detection rules. We will select “Manually Configure Detection Ruels” and click “add”. Enter the following fields:
- Rule Type: File
- Path : C:\Program Files\Global Secure Access Client\TrayApp
- File or folder : GlobalSecureAccessClient.exe
- Detection method : File or Folder Exists
- Associated with a 32-bit app on 64-bit client : No
Now we are ready to assign the app. Typically I would recommend assigning this to a pilot security group with computer objects of users in the pilot populated in there. In this instance we are opting to make this available in the Company Portal app and let users opt into it on their own. For this we are going to mark the app as available for all enrolled devices.
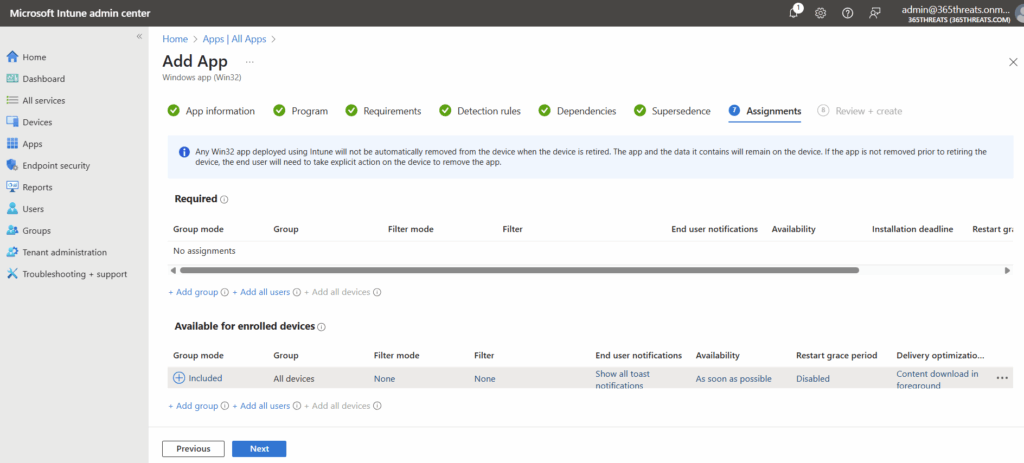
Our agent is getting uploaded and will be available for users shortly after this completes.

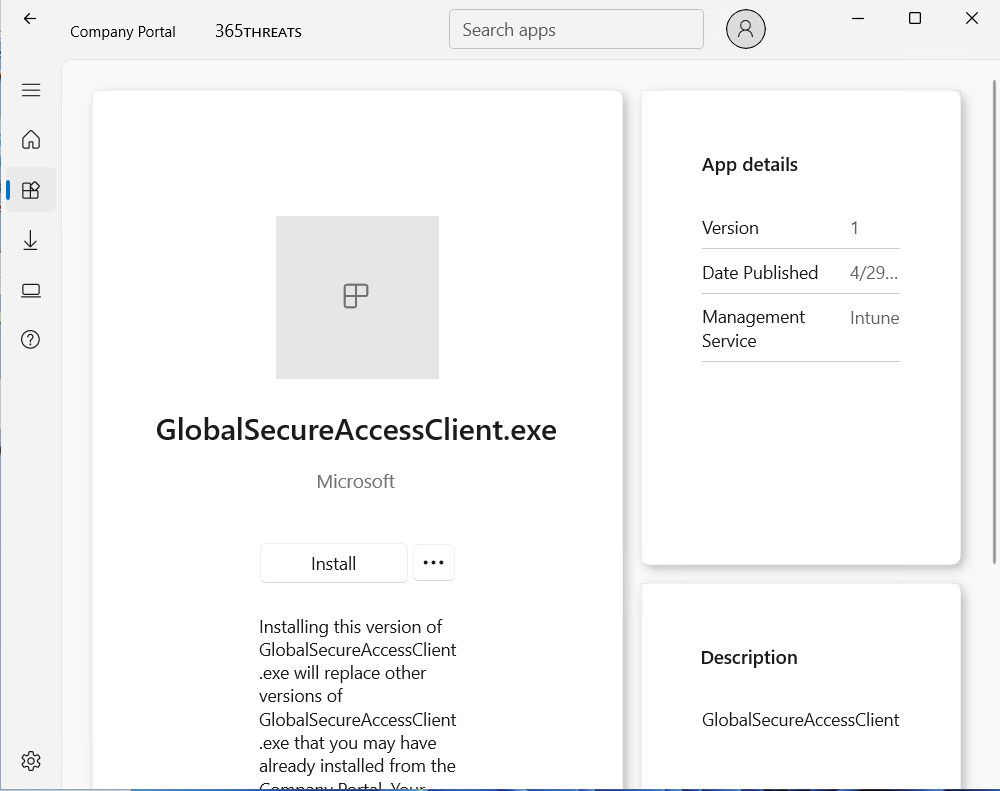
End User Experience – Installation
Now that we have the app available in the company portal app, the user can see and install it. Let’s click install.
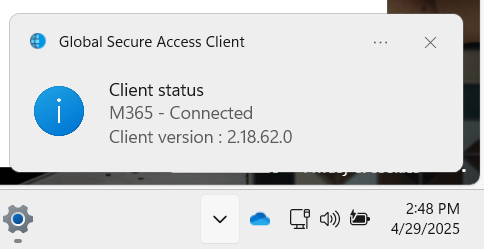
Once installed, the machine will need to reboot. Then we will see a new icon in the tray.
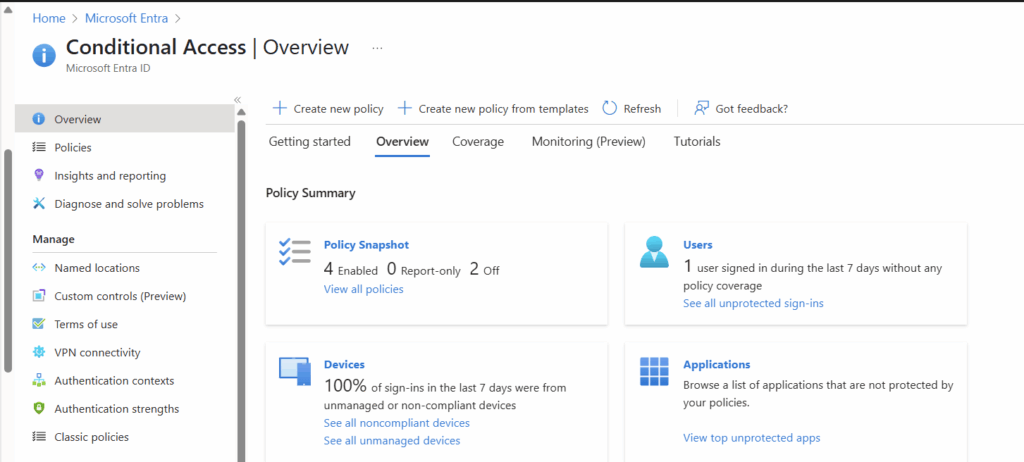
Let’s Secure Our M365 Environment using Conditional Access
Now we will build out a conditional access policy to restrict access to Microsoft 365 unless users are coming from Global Secure Access.
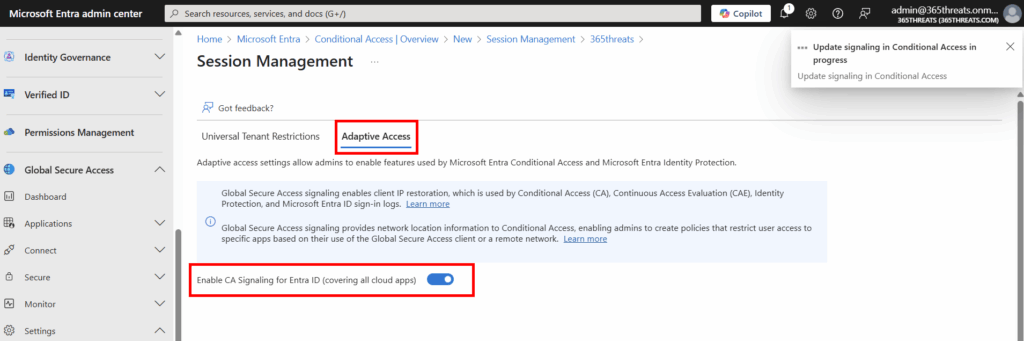
First, we need to configure Global Secure Access signaling for Conditional Access. We can get there by navigating to the Entra Admin Center > Global Secure Access > Session Management > Adaptive Access. Once there we will want to enable the control: Enable CA Signaling for Entra ID (covering all cloud apps)
Now we can create our Conditional Access Policy. In the Entra Admin Center navigate to Protection > Conditional Access. From here we are going to create a new policy.
Our New Policy will be laid out like the below and will block all connections to M365 unless the user is on Global Secure Access:
- Name: BLOCK: Require GSA for Access to M365
- Users: **up to you on your architecture of your POC
- Target Resources: Office 365
- Network:
- Configure – Yes
- Include – Any network or location
- Exclude – All Compliant Network Locations
- Grant: Block Access
- Policy: Report Only or On
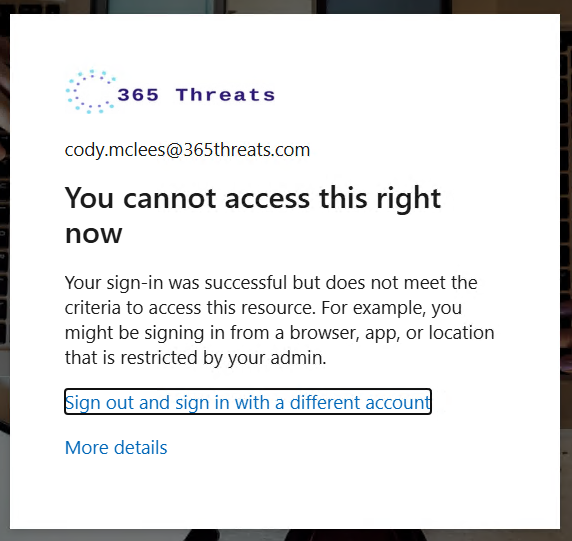
Let’s Test Our CA Policy
In our scenario our user is part of our pilot and has been enforced with the CA policy, but has not installed the agent on his machine so he will not be coming from a compliant network. When he goes to log into Outlook on the web he is greeted with the message below:
Final Thoughts
Global Secure Access brings network-layer security into the identity realm, offering an elegant, integrated way to protect Microsoft 365 traffic without complicating user experience or infrastructure. With zero-trust principles baked in, it’s a strong move for any organization looking to modernize their network security perimeter.
